
As you may not know (of course you don’t know, but here it goes), I’ve started my Master’s degree in Big Data and Data Science, which has led me to dive deeper into the fascinating world of databases. Part personal curiosity, part because of the courses I’m taking, this experience has motivated me to experiment with different technologies and learn in the process.
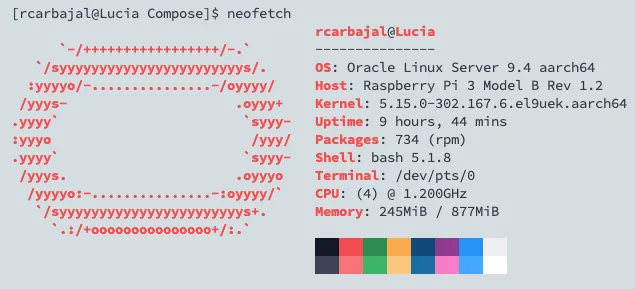
If you know me well, you know I’m a bit picky with my computer. I like to keep it free of unnecessary images, dubious libraries, and anything that could turn it into digital chaos. So, to preserve that order, I decided to rescue my old Raspberry Pi 3 from oblivion and turn it into my default database server. Because, why not take advantage of what you already have?
Technology advances by leaps and bounds, and that means older hardware often becomes obsolete for the latest software versions. I confirmed this firsthand when trying to install MongoDB. Turns out that versions after 4 are no longer compatible with ARM V8 processors, like the one used by the Raspberry Pi 3. There I was, wasting time fighting with Docker, the terminal, and a server that simply wouldn’t work.
I’m writing this as a personal reminder and, perhaps, as a guide for some other lost soul who finds themselves in the same situation. If you’re going crazy trying to figure out why your server won’t start, maybe this text will save you some headaches. Sometimes, the best learning comes from moments when nothing seems to go right.
If you’re here, it’s because you already have experience with the topic, so I’ll skip basic explanations you surely already master. Let’s get straight to the point, because if you’re reading this, I assume you’re looking for useful information, not an unnecessary review.
Build:
I’ll leave you the docker compose files below. In my case, I created a folder for each database, mongoDb, MariaDB, and PostgreSQL. Inside each folder is the corresponding compose file and the directory where the database files are persisted.
mongoDB: docker-compose.yml
services:
  mongodb:
    image: mongo:4.4.18
    platform: linux/arm64
    container_name: mongodb
    restart: unless-stopped
    environment:
      MONGO_INITDB_ROOT_USERNAME: user
      MONGO_INITDB_ROOT_PASSWORD: password
    ports:
      - "27017:27017"
    volumes:
      - ${PWD}/mongodb_data:/data/db
    command: ["--bind_ip", "0.0.0.0"]
    healthcheck:
      test: ["CMD-SHELL", "echo 'db.runCommand(\"ping\").ok' | mongo localhost:27017/test --quiet"]
      interval: 30s
      timeout: 10s
      retries: 3
      start_period: 40s

volumes:
mongodb_data:MariaDB: docker-compose.yml
services:
  mariadb:
    image: mariadb:10.11
    platform: linux/arm64
    container_name: mariadb
    restart: unless-stopped
    environment:
      MARIADB_ROOT_PASSWORD: password
     #MARIADB_DATABASE: mi_db
      MARIADB_USER: user
      MARIADB_PASSWORD: password
      TZ: America/Mexico_City
    ports:
      - "3306:3306"
    volumes:
      - ${PWD}/mariadb_data:/var/lib/mysql
      - ${PWD}/mariadb.cnf:/etc/mysql/conf.d/custom.cnf
    healthcheck:
      test: ["CMD", "mysqladmin", "ping", "-h", "localhost", "-u", "root", "-p${MARIADB_ROOT_PASSWORD}"]
      interval: 30s
      timeout: 10s
      retries: 3
      start_period: 40s

volumes:
mariadb_data:PostreSQL: docker-compose.yml
services:
  postgres:
    image: postgres:15-alpine
    platform: linux/arm64
    container_name: postgres
    restart: unless-stopped
    environment:
      POSTGRES_USER: postgres
      POSTGRES_PASSWORD: password
      #POSTGRES_DB:
    ports:
      - "5432:5432"
    volumes:
      - ${PWD}/postgres_data:/var/lib/postgresql/data
    healthcheck:
      test: ["CMD-SHELL", "pg_isready -U postgres -d postgres"]
      interval: 30s
      timeout: 10s
      retries: 5
      start_period: 40s
Obvious things we can’t ignore:
To install Oracle Linux on a Raspberry Pi, you’ll need a keyboard and a monitor, as it’s not a headless installation. Additionally, you’ll have to manually expand the partitions, install and configure the SSH server, and do additional work.
If you prefer to skip this process, Ubuntu Server for Raspberry Pi is an excellent alternative. Its headless version allows direct SSH access, and most of the initial configuration will already be ready for you to start working without complications.
It’s important to mention that I use this environment exclusively for development and testing, not for production. This is crucial, as in a production environment there are much stricter considerations to address, such as security, stability, resilience, and other critical aspects. What works well for experimenting or testing ideas may not be suitable for supporting a real workload in a business environment.
I hope you find this useful.
Directory tree:
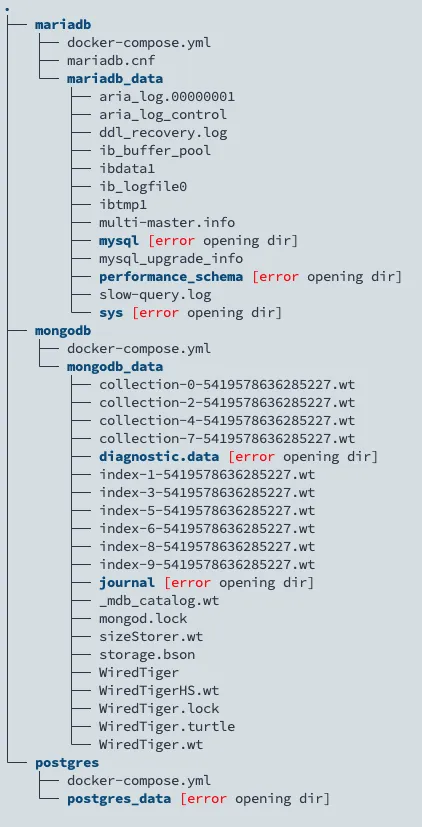
ignore the *_data, it’s the auto-generated database info